Puff Pastry

I’m a “self taught” baker. I didn’t go to culinary school — I learned everything on the job (from pastry chefs) and then taught myself everything I didn’t learn that I wanted to know with books and videos. Puff pastry was one of the first things I got truly obsessed with. The first puff recipe I tried was a handwritten page with only gram quantities listed. Under the method, all it said was “fold 6x.” The was scribbled down by Nina, owner of Bakeri in Brooklyn, and if you knew her you could instantly recognize her handwriting and characteristic lack of notes. Any time I’m testing a recipe these days it looks the same exact way — a list of numbers with no method — because I know in my head how I’m going to proceed. But still, most of the time my lack of notes gets me in trouble. Back to puff; I couldn’t really get this recipe to work out. I tried so many times and Nina even offered her assistance, but I wanted to get it right myself... Eventually I started to get better and better at laminating, but it was no overnight success story: 5 years later I will tell you I finally have the puff pastry where I want it. I’m not kidding. You can’t perfect a craft in a week, it takes years. And I love that.
Recipe Notes: Please use high fat (82% or higher) unsalted butter. Plugra or Kerrygold are usually what I grab for laminated goods. Keep your dough cold and make sure to mix it the day before to allow some hydration and relaxation to take place. Some people do this all in one day, but it’s never worked for me. When laminating, you should be able to feel a firm sheet of butter in between the dough, just like a laminated piece of paper between plastic. If it’s getting soft and mushy, STOP! Chill it immediately until firm again. You will do irreparable damage if the butter starts melting and the dough starts tearing. For you brave ones out there, this is a highly technical recipe, so even if it isn’t perfect the first time you make it… don’t give up! You’ll learn more with each new attempt.
puff pastry
400g all purpose flour
80g butter, unsalted, cold + cut into cubes
25g granulated sugar
6g kosher salt
175g water, cold
10g vinegar
+ 300g butter for the block, almost at room temperature
DAY 1
In the bowl of a stand mixer, add the flour, 85g butter, sugar, and salt. Using the paddle attachment, run the mixer on low speed for 3 minutes, or until all of the butter is dispersed into the flour and is barely visible. There should be no large chunks. Add the vinegar to the water, turn the mixer on low speed, and pour in while the machine is running. Allow a shaggy dough to form, which should take 3 to 5 minutes. It probably won’t be perfectly mixed and smooth. That’s fine! Tons of gluten is going to get developed in the folding process and the dough will get smoother, so don’t worry about having a perfect dough right now. Remove from the bowl and knead with your hands on the table for a few minutes. Press the finished dough into a square baking dish (8x8 or 9x9) and shape into a flat, equally leveled square. Remove from the pan, wrap tightly in plastic, and refrigerate overnight.
Make the butter block: On a sheet of parchment paper, trace the square pan you used to shape the dough. Flip the parchment over so you don’t get pen markings on your dough. Cut the 300g of butter reserved for the block into slabs, then arrange within the traced box. Using an offset spatula, spread the butter as evenly as possible. Chill and trim as needed until you have the perfect square. You can also place another piece of parchment on top of the butter and roll it with a rolling pin. I prefer spreading, chilling, and trimming the cold square until it’s perfect, but whatever works! When your square is done, fold it up in the parchment, wrap in plastic, and chill until Day 2.
DAY 2
Remove and unwrap the dough block. Roll out into a long rectangle at least twice the length of the square baking pan you used, while keeping the original width. The dough should be firm (somewhere between pie dough and biscuit dough) and should never stick to the table, but if it does, try flouring lightly and chilling in the freezer for a few.
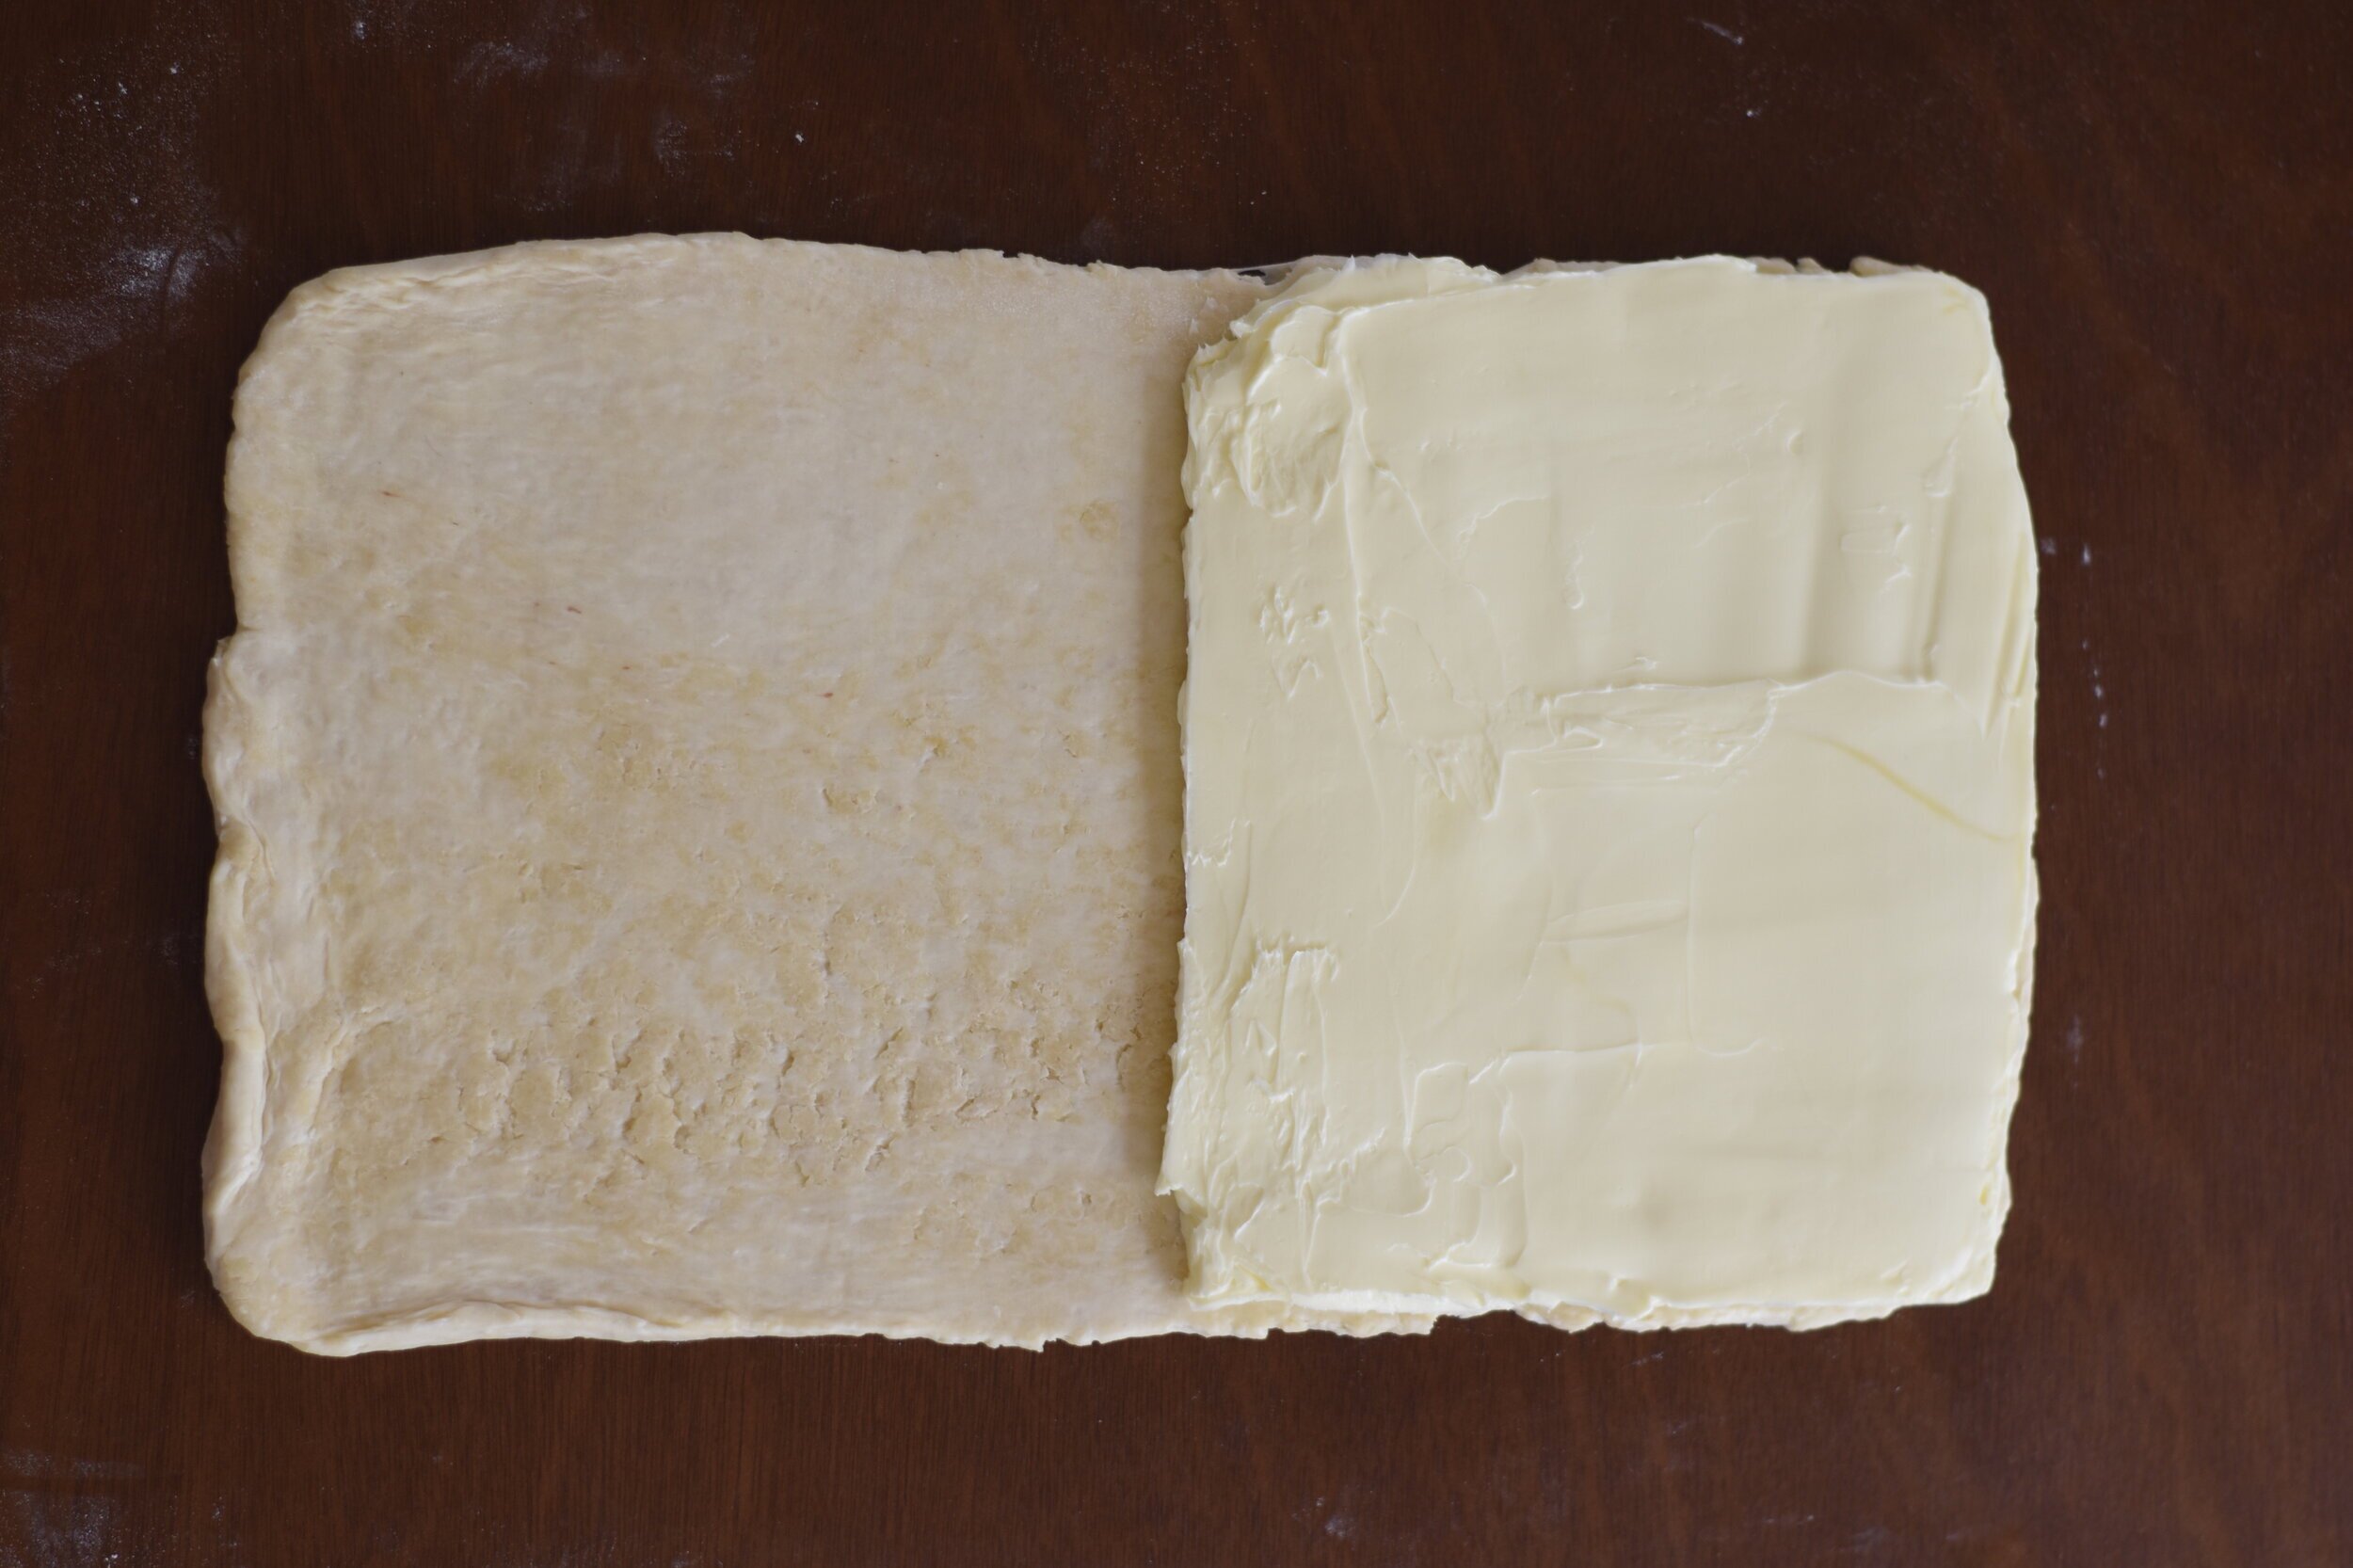
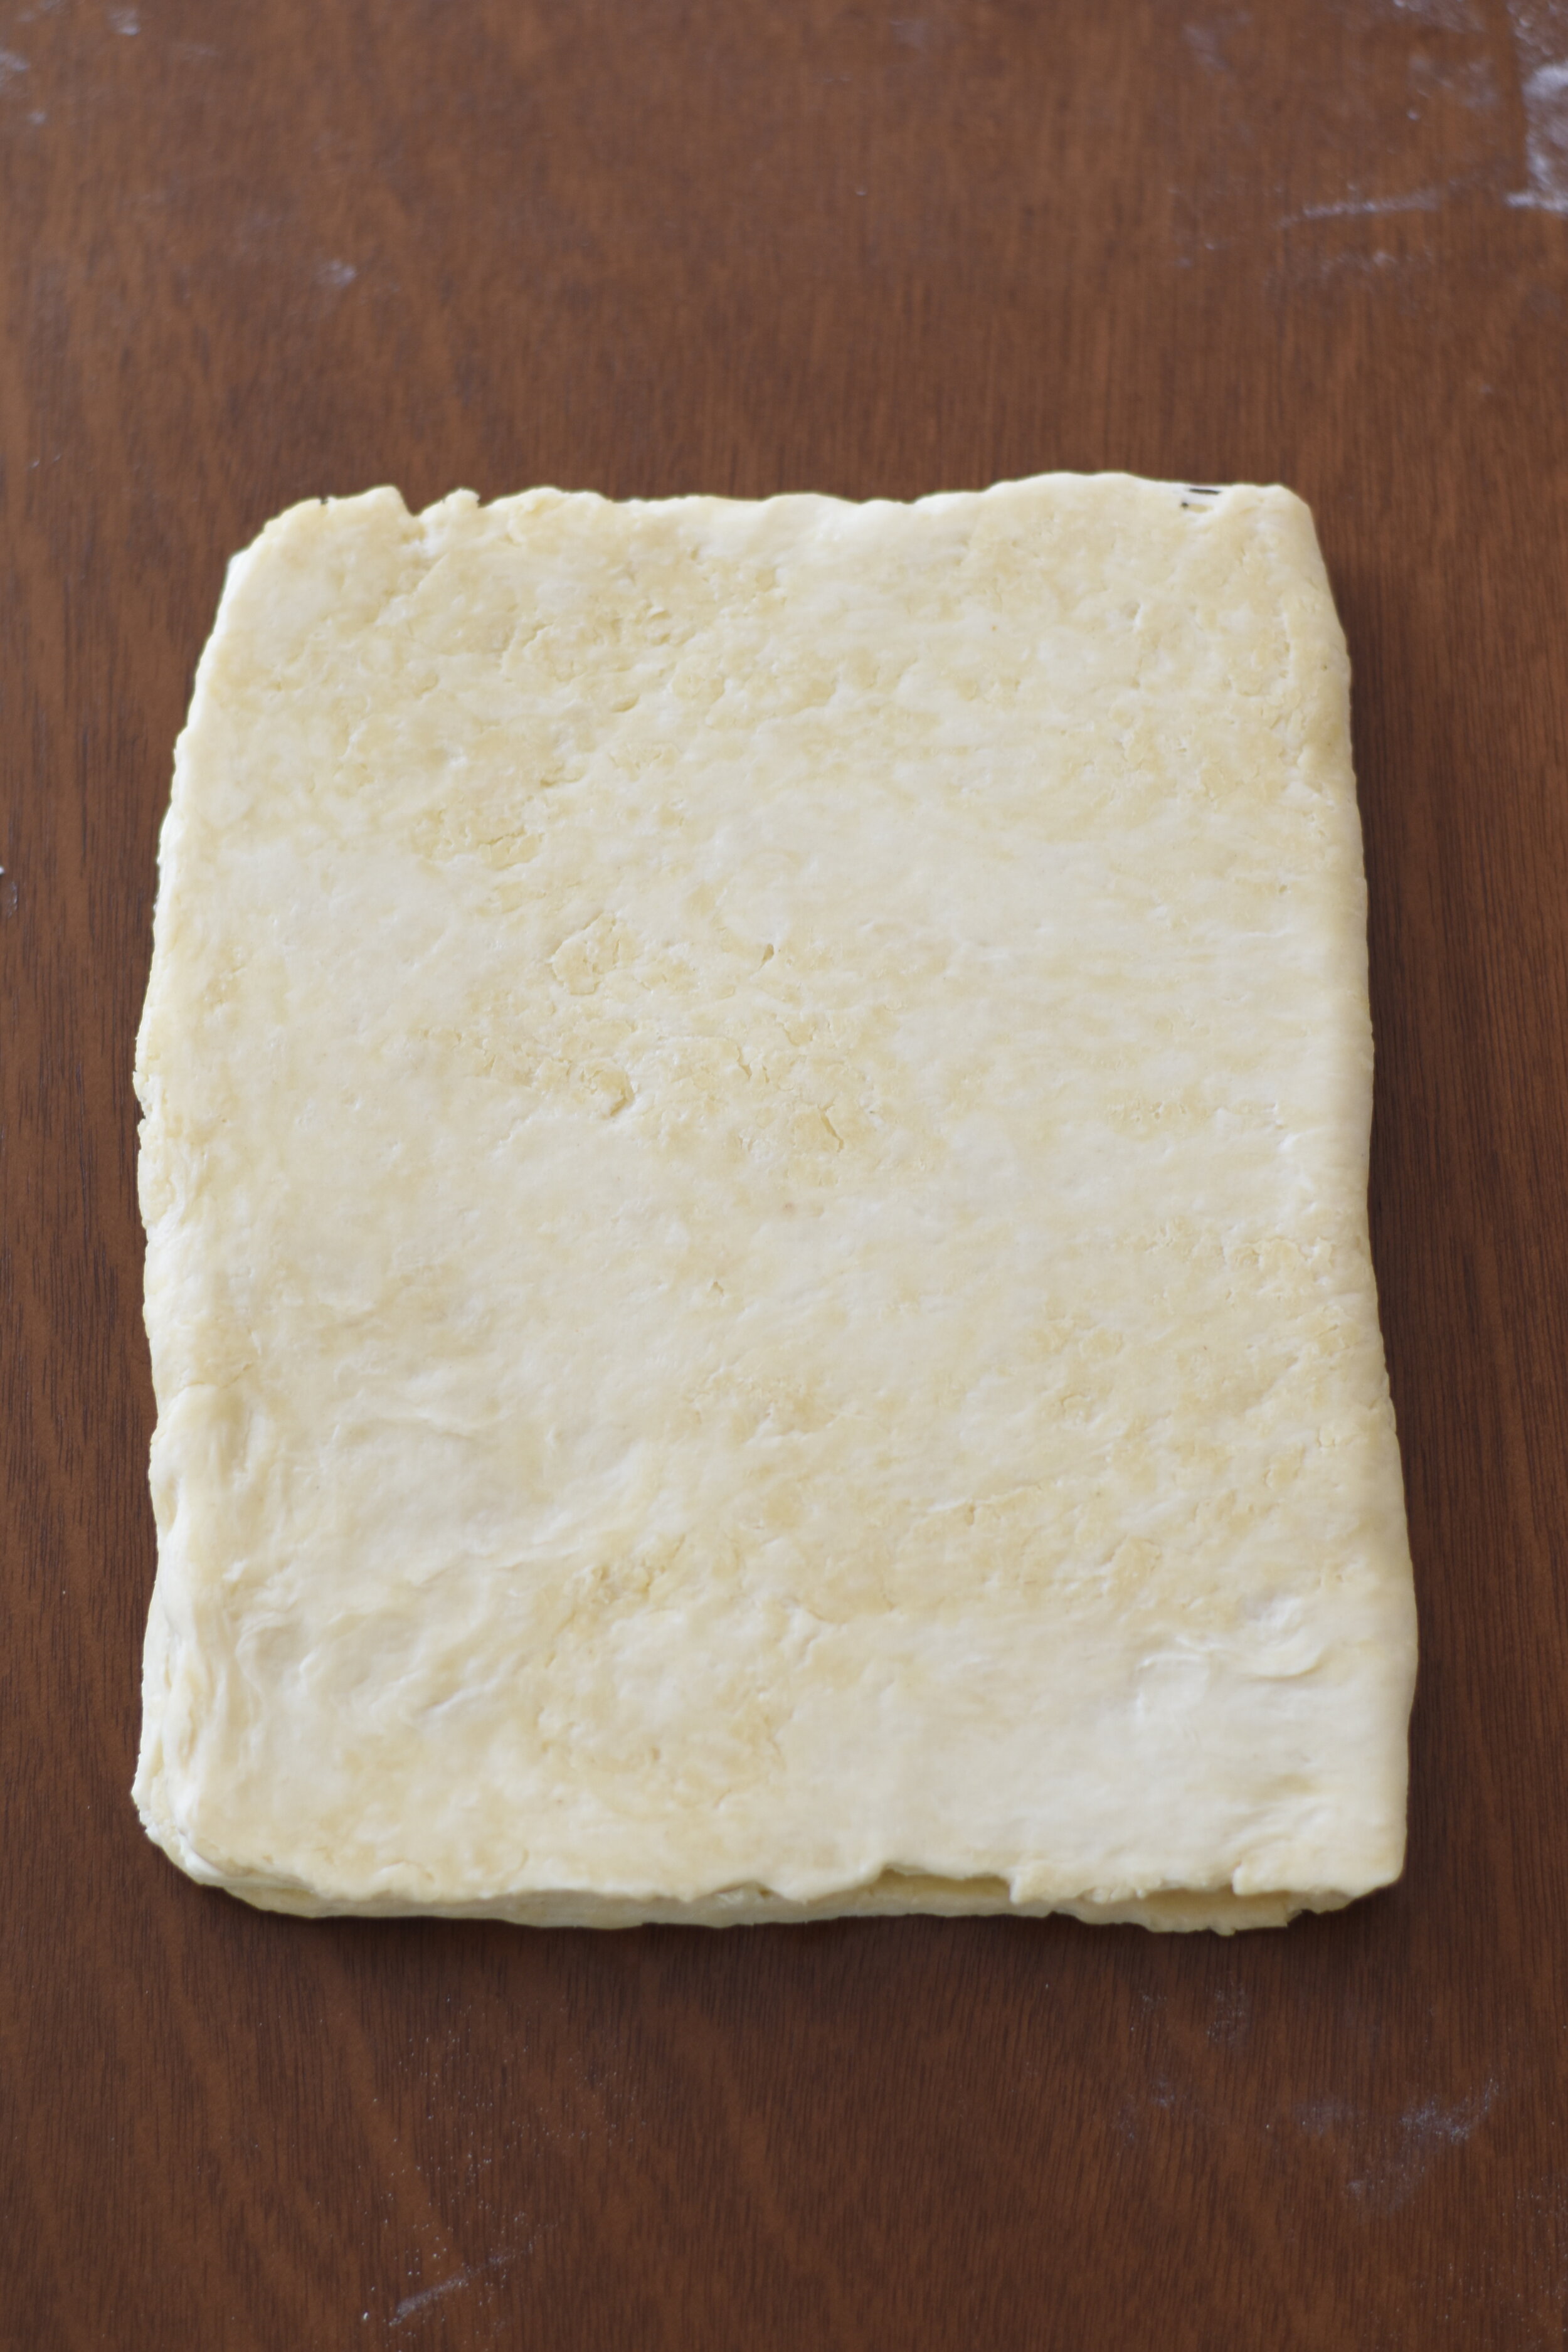
Remove the butter block from the fridge. Place it on the bottom half of the dough and fold the other half on top. Does it match up? If not, now is the time to fix it. I trim my dough even though it can be known as sacrilege to some, but I’d rather have evenly laminated pastry than a ton of wonky, unusable dough. When you look at your dough from the side, imagine a sandwich. The top piece of bread, the filling, and the bottom piece of bread should be pretty equal in thickness. When you’ve got the squares/layers matched up, it’s time to start laminating. Pinch the sides of the dough shut to fully enclose the butter in the dough package. I usually pop the dough package in the freezer at this point for at least 5 minutes, just to let it get nice and firm again.
Before beginning the folds, check if the butter is pliable. How do you check that? Turn your dough + butter package on its side so it’s standing tall. Gently attempt to bend it into a U shape. There should be some resistance, but not so much that the butter block breaks inside the dough. If it’s super easy to fold into a U, you might want to chill a bit longer. The temperature range between “too warm” and “too cold” is super delicate, so don’t beat yourself up if it’s not coming to you right away. Again, it took me years to get “good” at laminating, and I still feel like Jon Snow; I know nothing.
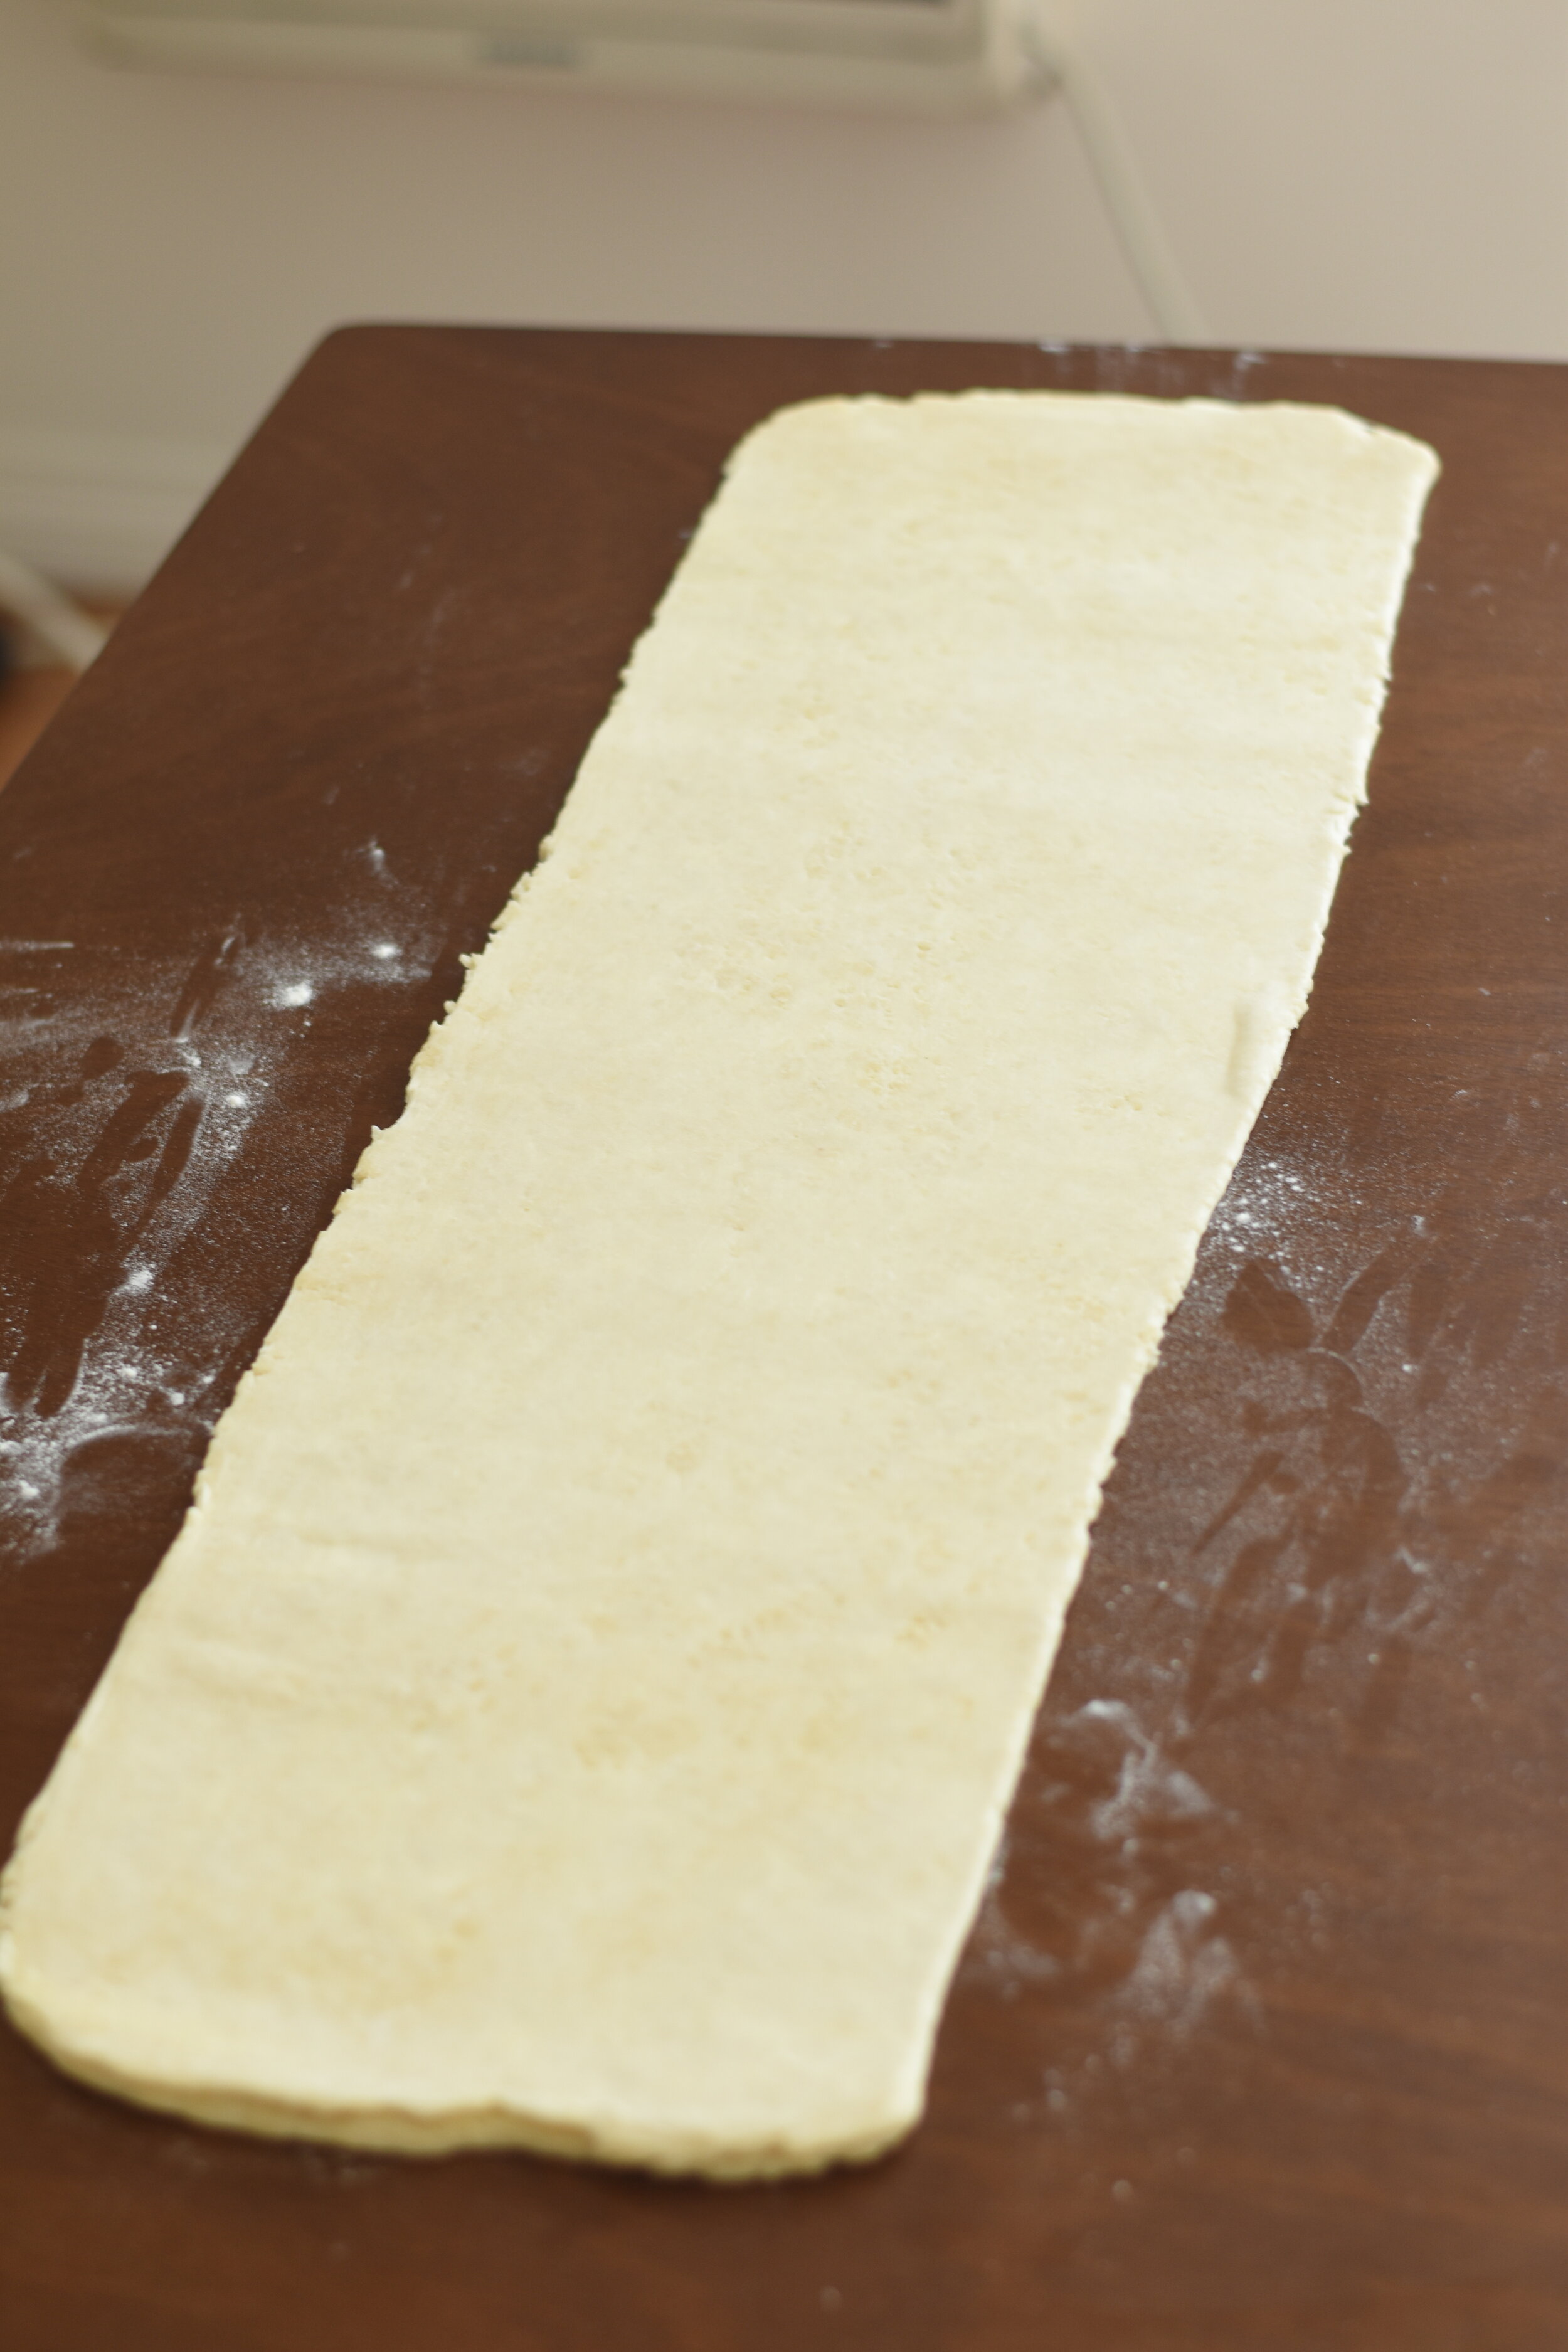
To laminate: Flour the work surface lightly. Begin rolling the entire package of dough and butter from the bottom of the block towards the top, pressing down with some force as you roll. Continue rolling until the block is 4x its length, and no thinner than 1/2”. Do not rotate the dough while doing this — try to roll in one direction only (up + down) as much as possible. This dough should be firm and probably won’t be super easy to roll, but as you keep going it will get easier. Once the dough is rolled out, we are going to perform a book fold.
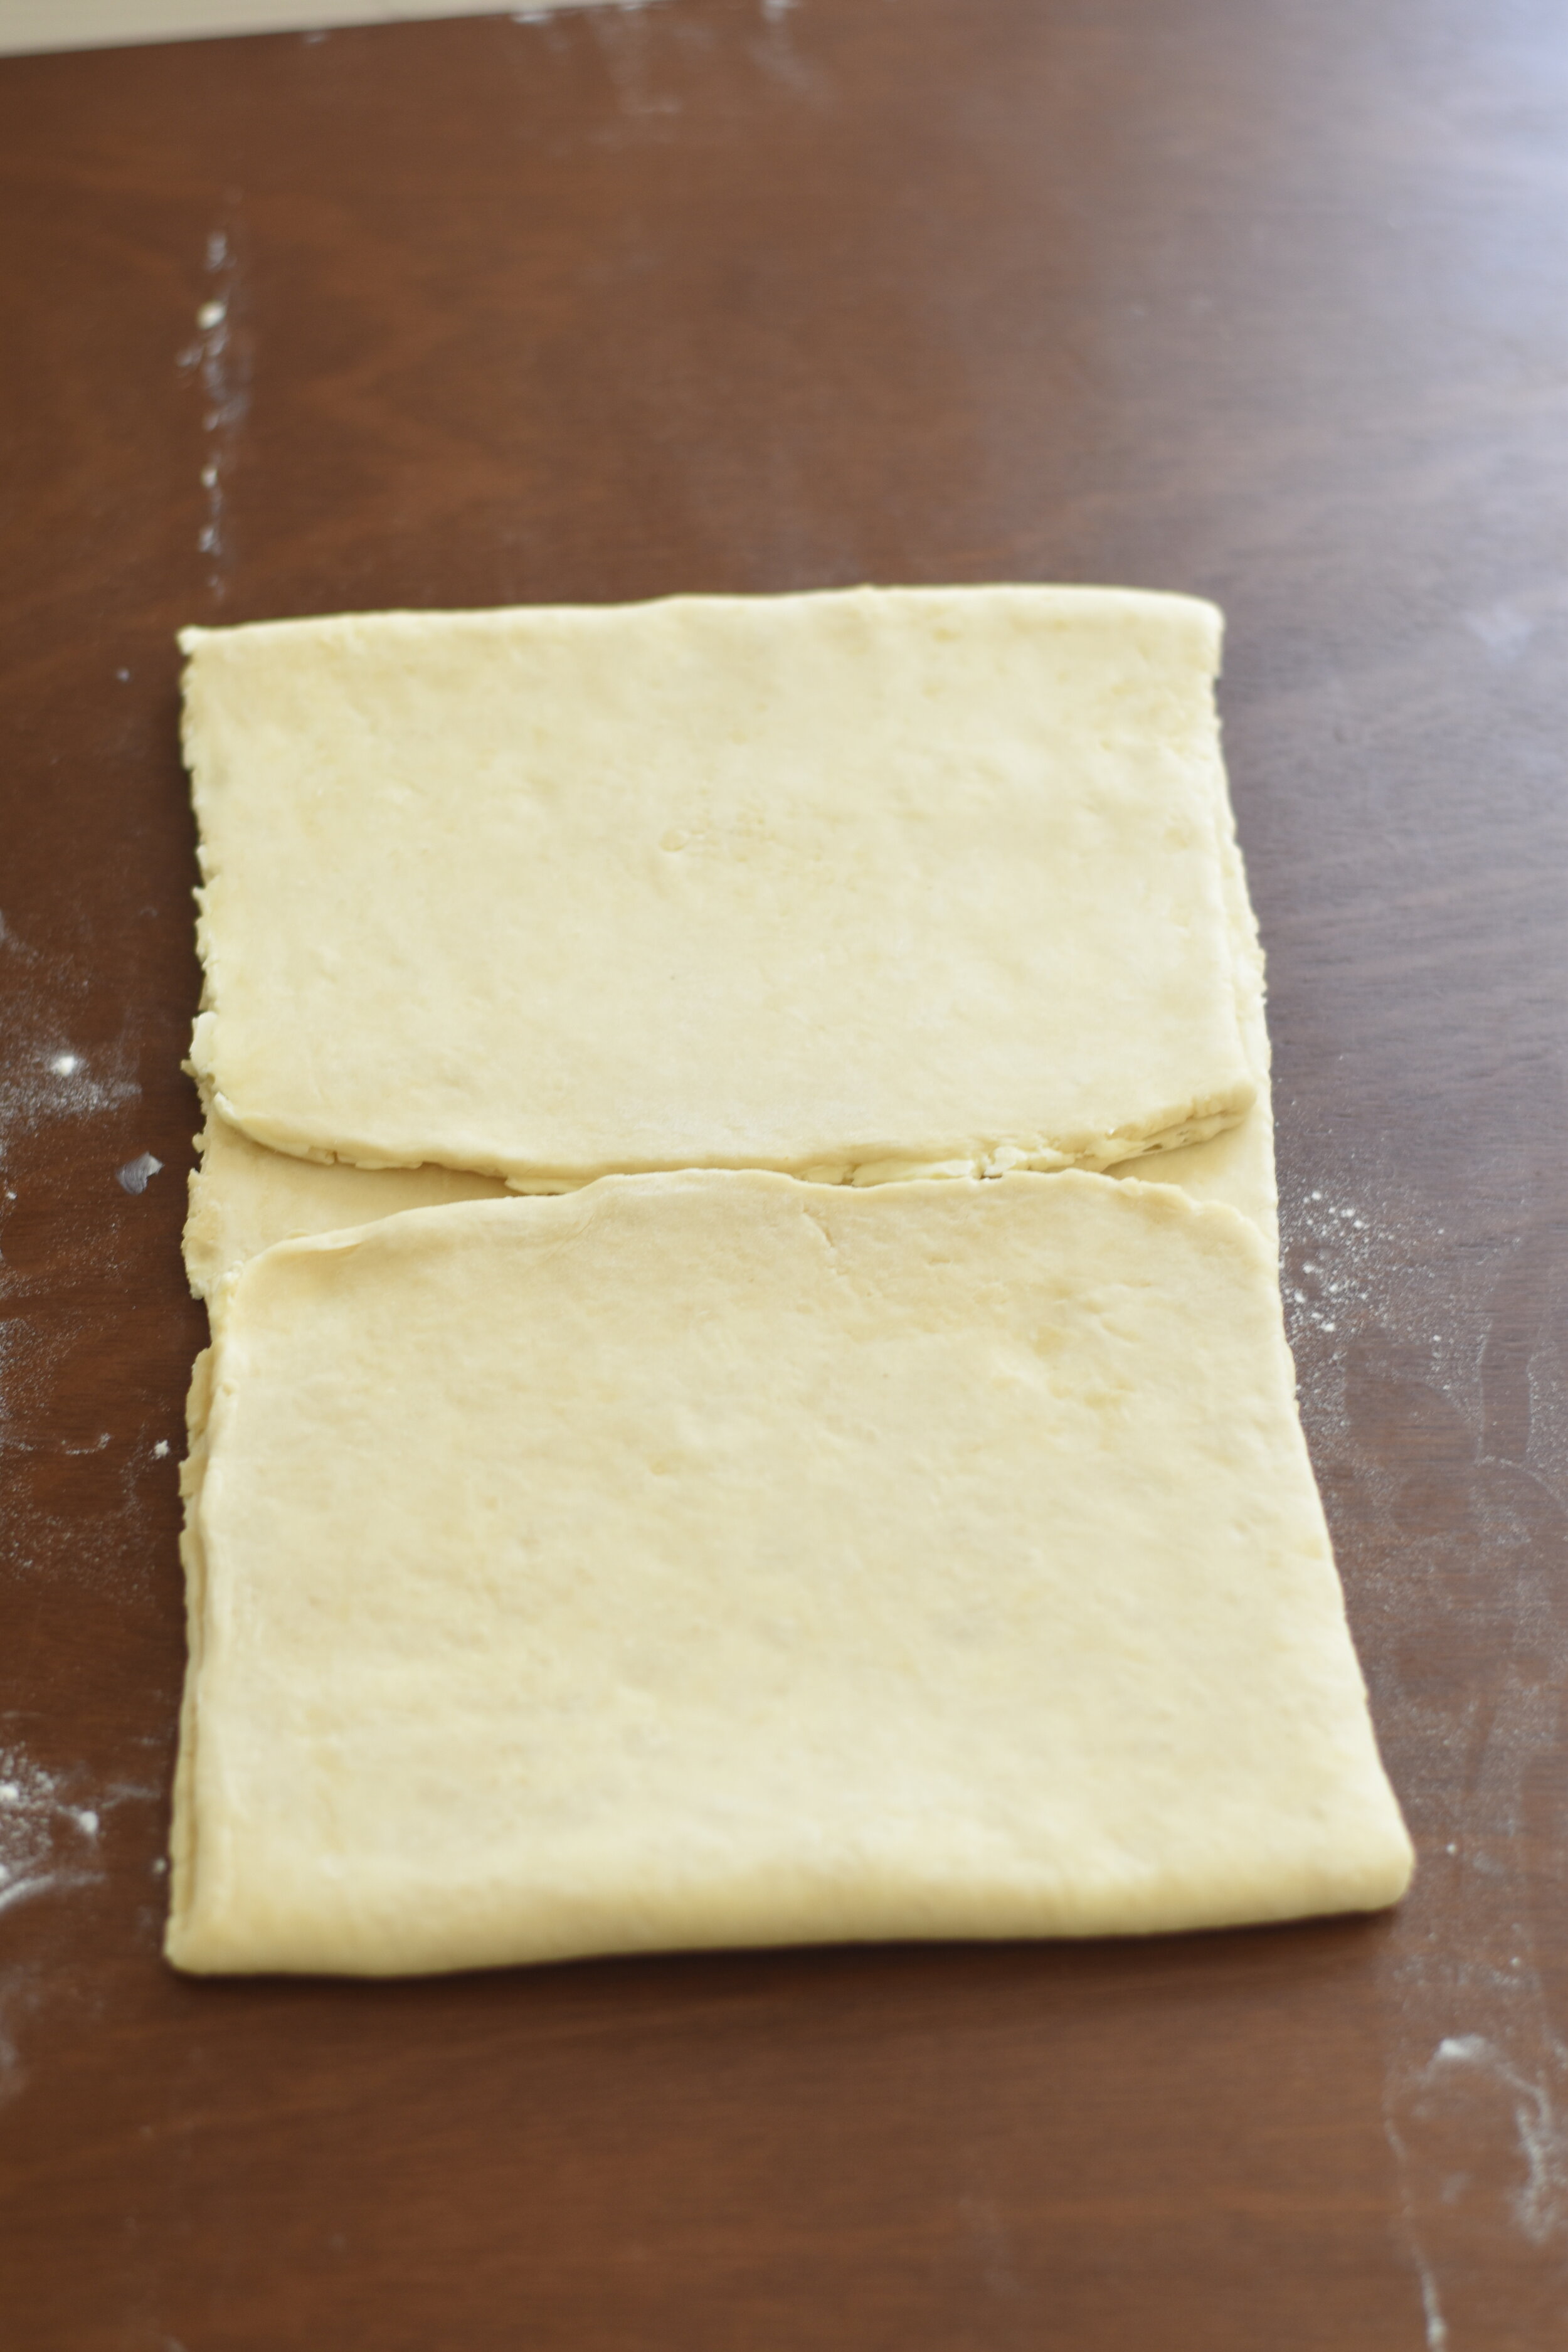
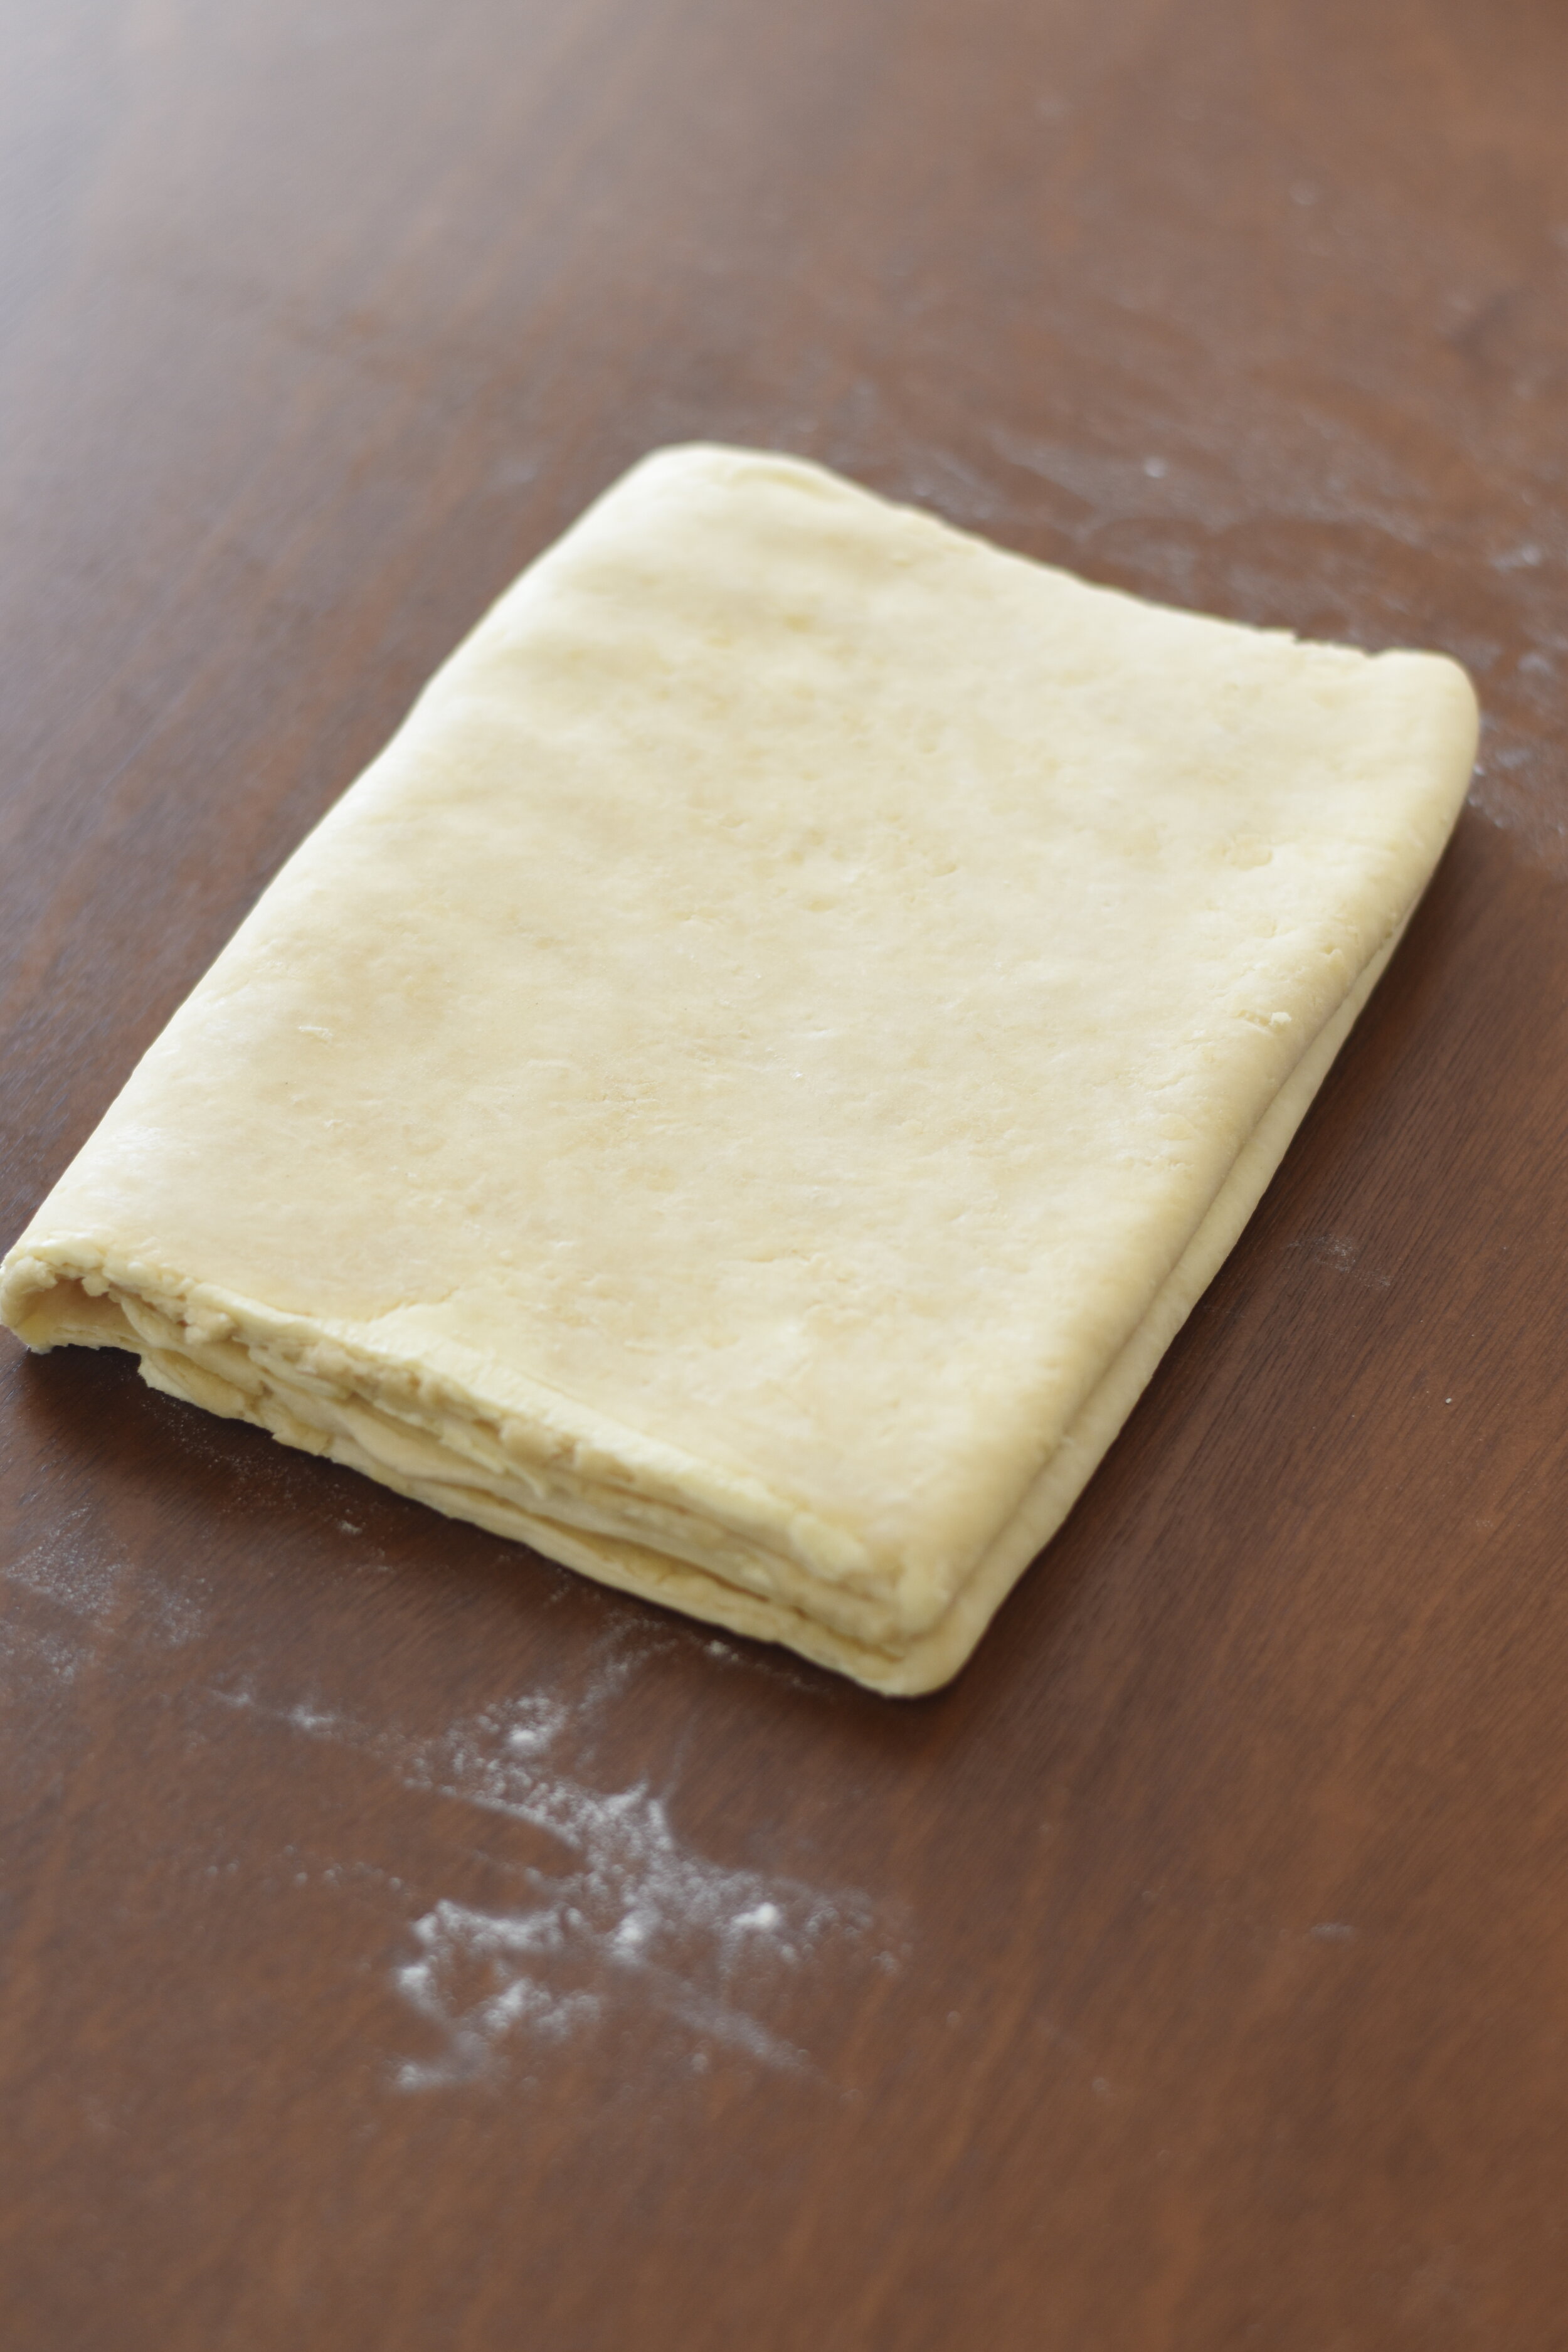
Book fold: fold the top and bottom of the dough in towards the middle so that their edges meet each other on top. It will look like an open “book” with the edges of the dough meeting on top of the bottom layer. Now, lift both sides of the dough and fold it in half again. It should now look like a closed book with four layers. Please refer to the above slideshow for a visual of this process!
You’ve now completed 1 of 3 book folds. Allow the dough to rest in the fridge, covered with plastic to prevent drying, for 30 minutes to 1 hour. Then, repeat the book fold process again. This will be your 2nd of 3 folds. Cover and chill again, another 30 minutes to 1 hour (or even longer if you can’t get to it right away), then perform your third and final book fold.
If your dough is super hard to roll and is shrinking a lot, STOP! Let it rest longer. This isn’t a race! If you need puff pastry ASAP, I advise finding a rough puff or blitz puff recipe.
Finishing up: Once you’ve completed your 3 book folds, the dough is ready to use, but should be relaxed again for an hour or overnight if you’ve got the time. After the resting period, roll the dough out into large 1/4” sheets. I typically cut my sheets to fit on a half sheet pan. Wrap and freeze to store. You can also just freeze blocks of finished dough before rolling them out, but I like to store mine in sheets for easy use.
Baking tips: puff pastry should go in the oven very cold or frozen. The oven should be at least 400º from the start to help the layers “puff,” otherwise they’ll just melt together and not be very flaky! Some recipes call for starting at a high temperature and reducing to a low one. I find it varies depending on your oven; some of my puff pastries can bake on 400º the whole way through. I usually watch and check if needed to make sure the edges and bottom of the pastry aren’t burning. It’s a good idea to test bake a single puff pastry to see how your oven works. I always bake my puff until it’s very golden brown — the last thing I want is gummy, unbaked layers after days of work. Make sure you give your pastries enough space between them to puff.
Now what?
Now you’ve got your very own puff pastry and you can do whatever you want with it! I recommend making some frangipane, topping with fruit and baking that way. You could also try your hand at a Mille-Feuille.

Fruit + Frangi Puffs
1 batch almond frangipane, softened and ready to use
A handful of your favorite berries
1 sheet prepared puff pastry, very cold
Powdered sugar, for finishing
Preheat the oven to 400º F and line a baking sheet with parchment or a silpat.
Cut the puff pastry into 3.5-4” squares, depending on how large you want them to be. Place on the baking sheet and prick the centers of the squares with a fork, but not the edges. Poking holes in the center prevents it from rising too much.
Place the frangipane in a piping bag (or just spoon directly on) and pipe a small amount on the center of each square, leaving some space around the edges. Top with berries and place in the oven for 20-25 minutes, or until risen, well browned, and puffy. Cool and sprinkle with powdered sugar before eating!